Thursday, October 16, 2014

Lisette attaché

I had a job interview on Tuesday and if course wanted to impress. I looked through a few patterns and came upon this one


http://oliverands.com/lisette-patterns/OLV-US1666.html

I debated the dress version but didn't want to over do it. Do I opted for just the top. Top b. 


Now came fabric.....


I finally decided on this linen and had just enough. 
It's a tad bug but I love it. The peplum is only on the side making it more flattering and less I look pregnant. The bodice gas princess seams, and like all things lisette tge instructions are great. 


My photographer was the 9 year old. Here is a better picture. 

I stole my 7 year olds necklace and let me tell you, I received so many compliments wearing it. I should dress up more often. 

Definately try the pattern it's amazing and I plan to make a dress soon as well. 

Have a great one.
Stay tuned for my persnickety knock off.

Kristen 

Tuesday, September 9, 2014

Modified jumprope tutorial.

I know I have mentioned Oliver + S before. I saw this shirt on Flickr and fell in love. 


Lily and I decided she needed one as well. Here are my mods. 
Trace front and back pieces. 


I decided since I wasn't doing the elastic I didn't want the A line look. I measures from the arm pit to the center line, mind is 9 1/8 so I drew a line 9 1/8 away from the center fold or cut line on both front and back. 

The back piece will now be cute on the fold. 

Now let's create the button bands. First measure 1 inch from the center fold line. Draw a line the length of the top. 

Do the same 3/8" from the line just drawn. 


The front will no longer be cut on the fold. Now we cut 2 pieces. 


Press the front under 3/8 on both sides. 


Also press 1 inch to the wrong side. 


I like to use interfacing in my facings and button bands so cut 2, 1" pieces the length on the front and press as shown. 


Sew shoulder seams 


We are going to use 1/2" single fold bias tape for the neck and arms. 


Apply per manufacturers instructions 


Top stitch your button bands down. 


Fold up 1/2" and an additional 1/2" and hem. 

Evenly space buttons and button holes. 

Wear on the first day of school with a ckc retro headband and modified holly trousers. 

Hope you enjoyed this tutorial, if you have questions feel free to ask. 

Have a great one
Kristen 

Thursday, August 14, 2014

An oldie revisited


Action Fingers


I first worked these fingerless gloves up for my two little girls to match some leg warmers that I had made, and they love them. I quickly decided I need various sizes and started making them for a bazaar. Everyone fell in love with them, so I decided to share them with you!. 

These are available in toddler, kiddie, youth, adult and XLarge. 

They will fit almost anyone. The fingerless gloves are worked from the top down for a customized length, and in the round so there is absolutely NO seaming involved. The possibilities for these are endless, I am providing you with a quick easy version in stockinette stitch. When making your own pair experiment with ribbing or color work.


Skill Level: Beginer
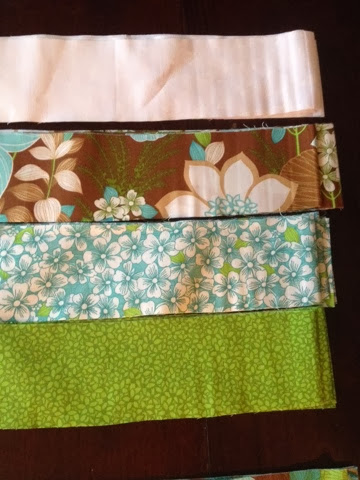
 

Materials:

 small amount of a worsted wieght yarn ( I used vannas choice)

size 7 needles (DPN or circular)

 stitch marker

 yarn needle.


Gauge: 4SPI, or 16 stitches in 4 inches. row gauge doesnt matter since we are working to a measurement.


sizes:

Toddler, Kiddie, Youth, Adult, XLarge, Mens


Stitch Guide:

2X2 ribbing = K2, P2 * around to end

Stockinette stitch = in the round it is knitting all stitches

BO = bind off

CO = Cast on


 Pattern is written for the smallest size with all larger sizes in parenthesis.


CO 24(24, 28, 32, 36, 40)

Evenly distribute the stitches between which ever type of needles you decide to use, whether it be DPN or on long circular for working in the round. Place a marker to mark the begining of each round.

Work 2x2 ribbing by alternating knitting 2 stitches and purling 2 stitches all the way around. Continue the ribbing for a total of 5 rows. * If you would prefer a tighter rib I encourage you to go down one or two needle sizes to achieve this.

We are now switching to stockinette stitch by just knitting all the stitches.( If you would like a tighter glove then continue with the ribbing. ) Continue in stockinette stitch untill entire piece measures 1 (1.5, 2, 2.75, 2.75, 3.5) inches

Thumb hole : knit 2 stitches, BO 3 ( 3, 4, 4, 5, 6) using Jennys Surprisingly Stretchy Bind Off. Knit the remainder of the stitches to the end.

Knit 2 stitches, CO 3 (3, 4, 4, 5, 6) using a backwards loop cast on, knit to end.

Continue working in stockinette stitch until gloves measure 3.25 (4.25, 5.25, 6.25, 6.25, 7.25)" work  5 rows of 2x2 ribbing and BO using a stretchy bind off.

I have done these in bulky and a size 8 needle in ribbing with an 3spi. For a youth I co 20. :) 


Monday, August 11, 2014

Any and all recent sewing

Oliver and S Hide and seek dress


Rabbit Rabbit, humming bird


Ottobre button down and Fishsticks mud splasher shorts with cargo pocket


Create kids Couture Hadley


Elsa INspired dress mash up

SOS 14 Nelle #1

Let me introduce you to my new friend. Her name is Nelle. She is the reason behind PatternSOS14.  See I had bought her and come to find out she was already in my dropbox....

Nelle is a super cute Brownie Goose pattern that I purchased from Etsy, right Here.  She goes from 6-12m up to a 6/7.

It is a cute little pattern. Her instructions are clean, clean and cohesive. I did sew this  a little differently than the directions for my own preference and no fault of the pattern designer. Sometimes we just prefer things to be done a certain way.


Nelle was inspired by a dress I saw at The Children's Place a few weeks ago that didn't come in either of the girls sizes. I took a picture and kept it for safe keeping.. I spotted the Nelle a few weeks ago again and knew it would be perfect for Lily.


Unfortunately it only goes up to a size 6/7, but lucky for me she is skinny so I just added length to the skirt ( I did try the bodice on her before attaching the skirt) and neck elastic.  Aside from the steps I changed I did a rolled hem on the top of the skirt and sewed it on top of the bodice instead of with right sides together.

If of course needed a belt. I picked this up at Joann Fabrics, I cut it to her length, and sewed little squares of vinyl to the ends and added some snaps for closure.

I am still debating if it needs something to cover the snaps or if I should just let it be.

It came out just as I had hoped if not better. I love it and recommend giving Nelle a shot, it really is a cute pattern.


This picture is from a reading celebration day at the end of the school year. Avry has on a RabbitRabbit Humming Bird dress, Jack an Ottobre button down and Mud Slide pants from Fishsticks and Lily the Nelle.
 
 
THanks Kristen

SOS14 Garden Party Dress

I already love Oliver and S and have for a while now. When they released 2 new dresses I had to scoop them both up. First one I sewed up was the Garden Party dress. It has so many options it feels like, short sleeve or sleeve less, tunic/top or dress.


Lisel at O&S has amazing instructions. She might be one of my favorite in terms of instructions. The finished garment looks professional and complete.

I knew I wanted to make this one for Avry, something about it called out to her. I happened to have a yellow floral fabric with matching plaid that would look divine on her. I also wanted short sleeves, something she could wear in summer yet still have some shoulder coverage. Poor girl is just like her mama and she burns if there is a forecast for sun. 

I did add a little bit of length to this, I ended up making her a 5 I think with a 7 length.


I used her tutorial for making a thread chain. Since I do know how to crochet I did crochet mine with a crochet hook.


I see many more of these in the future..

Have a great day,
Kristen :)

Double Blogging

Apparently I have been double blogging. I will be continuing with just this blog. Here is the link to the other if you wanted to read. http://deweysredplus2.blogspot.com/

Wednesday, August 6, 2014

Summer Pattern Flip

Lets do a little pattern flipping! Over at France Suzanne there is a little Flip This Pattern contest going on.
The pattern chosen is the Ethan from SisBoom.


If you haven't sewn a SisBoom Pattern, you should definitely try one, her patterns are very, very detailed.


”"


Have a great day!
Kristen


Wednesday, May 14, 2014

Pattern sew off show-off 2014!!

Shh don't tell my husband, but I think I have a few patterns.  I haven't counted and won't be counting but realization hit when I bought a pattern I already owned in my Dropbox. If you haven't heard of Dropbox. It's fabulous. It is a great online storage decide. It is free but you can of course purchase more storage space.  Here is a link.  https://db.tt/IOI12So0. You can store files, photos anything. I personally use it for pdf patterns. I can access it anywhere I have internet access even my phone! It's beneficial especially if I am at the fabric store and need fabric requirements for a project. 
Ok enough about Dropbox. 
A few friends and acquaintances and I are going to attempt to make a dent in the amount of un-sewn patterns I own. Pictures will be taken and possibly reviews. No more, ok a lot less pattern buying will hopefully happen as well. I am hoping in this process to learn to better learn my camera.  We are calling this Pattern Sew Off Show-off 2014 or #patternsos14. 
This week I have already sewn 2 dresses but I am not going to tell you about those until I have taken proper pictures. No more crappy cell phone pictures. Don't get me wrong I have no hopes of trying to go pro but I would like to learn to use my camera better and in the process get some decent pictures of my kids. 
That's all for tonight. I just cracked a new book "Wishes and Stitches" by Rachael Herron and I have a sweet boy looking to cuddle. 
Have a great night. 
Kristen

Saturday, May 3, 2014

Trying

In an attempt to get back and blogging and learn to use my camera in manual I am going to try and do the May photo challenge from The Idea Room.  I of course started late lol.

Day 1: Enjoy

 
lens 18-55MM,   1/200    5.6      152-5228


 Day 2: Metallic
 
lens 18-55MM, 1/100   5.6   152-5229


Please keep in mind I am learning how to shoot manually. I have a long ways to go but this is just the beginning. Any and all tips and tricks are welcome!!

Have a great one Kristen

Saturday, January 25, 2014

New year, new quilt!

I ran to walmart yesterday and I swear I can not go in that store and not see their fabric. It's a weekness I tell you! 
I have been meaning or at least had the urge to make another quilt. It is my secret ambission to be a fabulous quilter. The perfectionist in me fights with this so the procrastinator tries to equal all out. 
I spotted to pretty jelly rolls, well 2 they were the same. So I picked them up. 
Came home and went searching for easy jelly roll quilt patterns. 
I narrowed it down to 3, 
Strip twist won. 
I sorted all the jelly rolls and separate them into 3 groups of 4. 

 As per the pattern I needed to have 2 dark and 2 light in each pile. 
As I finished 3 sets of 4 from each pile I decided to shake it up a little and mix these up so I had 4 different sets of 4 strips in each. 

I had a beautiful little helper that handed them to me as well as helped me sew them together 


See aren't they pretty! 


I finished this last night. This morning I pressed all my seams towards the dark fabric. 

Now I have cut them into 8.5" squares making sure to even up all 4 sides.  From my 2 jelly rolls I had 15 of each set so a total of 60 squares. 

I have more cutting and sewing today. Hope you enjoyed so far. 
Have a great day. 
Kristen

Tuesday, January 7, 2014

Late Christmas dress

Before Christmas I joined a sew along with the amazing create kids couture. It was for the joy dress. At first I was put off because I assumed it took a lot more fabric. 
Boy was I wrong!
The construction is genius! I thought there were multiple layers but there aren't. 
The instructions are clear, the fit is spot on and it's super cute and ruffly!

Ok enough talk here it us with my beauty. 

Yes even a doll version!


That's all for now! 
Hope your holidays were wonderful. 
Here are a few things I have made this year. 


Kristen