Saturday, September 29, 2012

Lets talk food!

My husband has gotten back on board with having his diet help with lowering his blood pressure. He does however take medication daily for this. But the more help the better. WE started back up on eating better than normal this past week.


One day this week we had pesto from the garden, baked chicken, steamed brocolli and whole grain pasta.
I was attempting to use what I had this past week when getting back on track.

A previous yummy, this with random veggies, grilled steak tips and scallops


Here are some of the lunches that Lily has had in school so far.


I will end my post with tonights desert!


If you have any questions about anything please ask!!

Have a great day,
Kristen.


Wednesday, September 26, 2012

A challenge!

I have decided to issue myself an Oliver + S challenge. I will update more from a computer so stay tuned.

Friday, September 21, 2012

Fashion Icon sewing

This week over at Project Run and Play the theme is Fashion Icon sewing. I searched and racked my brain to find something age appropriate to sew for one of my littles. Then I came upon this.

Audrey Hepburn In Paris, her little black dress. I was sold. Her style , femininity and simplicity of her ensambles is breath taking. I got to work. I knew I wanted a 50's inspired dress, and a boat neck. I searched through my patterns and remembered the Precious Dress from the Scientific Seamstress . I chose this pattern as a base because I wanted the skirt to fall at her waist or hips with a fitted bodice.
Here is my version.


I had to alter the neck line and size but it came out stunning. I adore it as does she. She truely does look like a little Audrey in a modern day little black dress.
 
Have a nice day,
Kristen 

Friday, September 14, 2012

Sewing

I have been sewing like what feels a mad woman LOL. Basically what is more than normal for me on top of working more hours and a small cold this week. Here are a few of the things I have made this week.
Lilys teacher has computers set up in her room and the children get to used them for various academic purposes throughout the day, Part of these exercised require the use of headphones or ear buds as to not disturb the class. I did find her a pair of head phones, but I surely wasnt going to send them in just a plain zip lock bag,

It had seemed that all the girls in the house, except Avry had a circle shirt. She was feeling left out. So what is a mama to do, why whip one up of course. This one is made from a brown gauze, so its great while the weather is still warm, and will be perfect in colder weather layered. And she loves it, wore it to school yesterday and looked absolutely adorable.


I tried my hand at machine quilting for the first time, and I am sold. I had so much fun. I had these I spy quilt squares laying around so I sewed them up quickly and made this .

Kids stole it as soon as I took the pictures. Look I even put a cute little label on it.

See my machine quilting, not to bad for my first time steepling!!

Both girls got a pair of these dortje pants cut to capris. Lily has pink, Avry the natural.


In my Pajama sew athon last week I made these for
LJ.

 
 I made this Jalie 2911 for me, it almost makes me look forward to winter.
 
To say I may be hooked on quilting, could be an understatement. I did this chevron/zig zag It was super quick and easy. It is doll sized though.
 
The backing, with my tag :D

Thats all the sewing I have for now.

Check out my Lunches page as well. I try to take pictures of Lilys lunches daily, its my own bento style.

Have a good day,
 

Monday, September 10, 2012

night gown tutorial

In this tutorial I will explain how I took a button down shirt a pattern and turned it into a girls winter night gown like this.

 
First lets grab our materials. You need a ruler, a tried and true pattern, one you know fits and works well for you, pens,tracing paper and fabric.
 
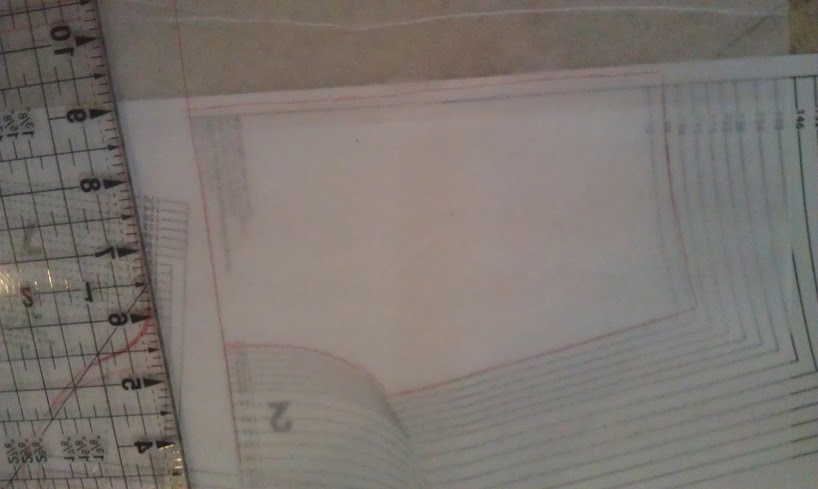
We are going to start with the front, the intended fold line for the facings will be the fold line for the front. Trace the neck, shoulder and arm hole seam lines, (my pattern doesnt include seam allowence but I will add that later)
 
Your yoke seam will be drawn a 1/2 inch from the under arm.

 
Following the neck line up until about an inch from the fold edge, cuve it for a neater, more girly finish.

 
My pattern had a back yoke separate from the body so I combined the two so the back was one piece. First I traced the yoke as it was.
 
Now in order to add the bottom piece I had to readjust the piece. I extended the line that I drew for my back fold line and made it longer. 
 
I lined the arm hole seams up and continued tracing ,
 
 making the back yoke as I did the front and extending the underarm seam by 1/2 inch. 


The new back yoke piece.
 
Lets make a facing piece for our neck line. First off tape the sholder pieces you just traced at the sholder. Because my pattern didnt include seam allowence I just matched up the lines and taped them.
 

If your pattern doesnt have seam allowence included in it, you will need to draw your seam allowence in at the neck line to include the entire front yoke length. * Please note my picture doesnt show the seam allowence including the front yoke length.

 
Now we need to finish the facing. I made mine 1 1/2 inches. So I measured the neck line I just drew and marked all along it for 1 1/2 inches wide.


Connect the dots.
 

Time to cut our pieces.
 When cutting your front facing piece you can choose to cut it on the fold or not If you dont cut it on the fold you will need to add seam allowence to that part only of the front facing.


(like my pattern weight LOL)
The length and width of your night gown body are best determined on the size you are making. Being that I am making this for my 5 year old the 44 inches wide my flannel is will be perfectly fine for my width, I measured the length to be 24 inches. When measureing measure from the underarm.
 
If your selvage edge is printed on, and if you choose cut it off.
 
Before we sew, lets add some interfacing to the front yoke facing.
 
 
Time to sew. First sew your front shoulder seams to the back shoulder seams.
 
see
 
 
If you did not cut your facing on the fold you will need to sew the back seam.
 
Line up the facing, right sides together and sew it to the front yoke.
 
 
Finish the edge not sewn to the neck line.
 
 
Flip the facing to the inside, and press.
 
Top stitch the edge.
 
 
Sew another line of stitching approximately an inch from the first line. This is to catch the edges of the facing,
 
 
Sew the sleeves into the arm holes.
 
 
Finish the sleeve edge.
 
 
Sew the underarm seam , making sure to include the small 1/2 inch side seam.


Pending on the size you made your night gown, sew the back seam or side seams.
 
 
Run a gathering stitch along the top of the night gown,
 
 
Match up the front yoke pieces, so the right over laps the left.
 
 
Turn the yoke inside out, and place it inside the body, right sides together.
 
 
If you choose, top stitch the yoke/body seam . Hem the sleeves and body.  Mark and add snaps to the front yoke to keep it closed.
 
 
Voila!


Make a few, have fun and enjoy the night gowns you have made,


Have a nice day ,
Kristen :)